Jul 4, 2011

Sharepoint webpart maintenance page

Hi Guys,

Some times while working with the Sharepoint pages ,we are unable to open/edit the page in the sharepoint designer if there is a problem with the webparts(generally script included webparts) . In such cases if we want to remove the issue caused webpart we will go for this webpart maintenance page.

This is a small way/trick to find the webparts on a page in sharepoint with their status.

If your page url is  http://myserver:5485/default.aspx

add ?contents=1 at the end of the url i.e http://myserver:5485/default.aspx?contents=1


From here you can find theat the webpart with name Demo2Tasks is on the page but it is in closed state.

Happy reading..!


Jun 13, 2011

Sharepoint List Data as XML

                         
  When working with the Sharepoint List/Library, sometimes we need the xml specification of the list/library data. A simple example I can give here is like when we are working with a column in the list, later if the name of the column is changed, we will try to get the value using its current name but we can get the result only when we use its original name which was given at the time of column creation.

In that case to find the actual name of the column we can use these steps to know the original name.


This is not only the case where we need the XML data of the list, there are some other cases like when we are working with script to get the sharepoint data from its webservices, we will need this a lot.

These are the steps to find the XML view of a Sharepoint list /library
  • 1.      Find the GUID of the list/library
  • 2.      Place the GUID Iin XML view link


Step 1: Find the GUID of the list

Go to view all site contentàList settingsà in Url you will find

http://yourservername:port/_layouts/listedit.aspx? 
List=%7BCCD41672%2DD08D%2D41F4%2D88A4%2DD9D8C741B0C6%7D

Replace %7B with “{“, %2D with “–“and   %7D with “}”

So your GUID looks like ={ccd41672-d08d-41f4-88a4-d9d8c741b0c6}.
Get full information here

Step 2: Place your list GUID in this url


http://yourservername: port/_vti_bin/owssvr.dll?Cmd=Display&List={345e3a5e-6855-4ef7-b901-cb3f0a196872}&XMLDATA=TRUE

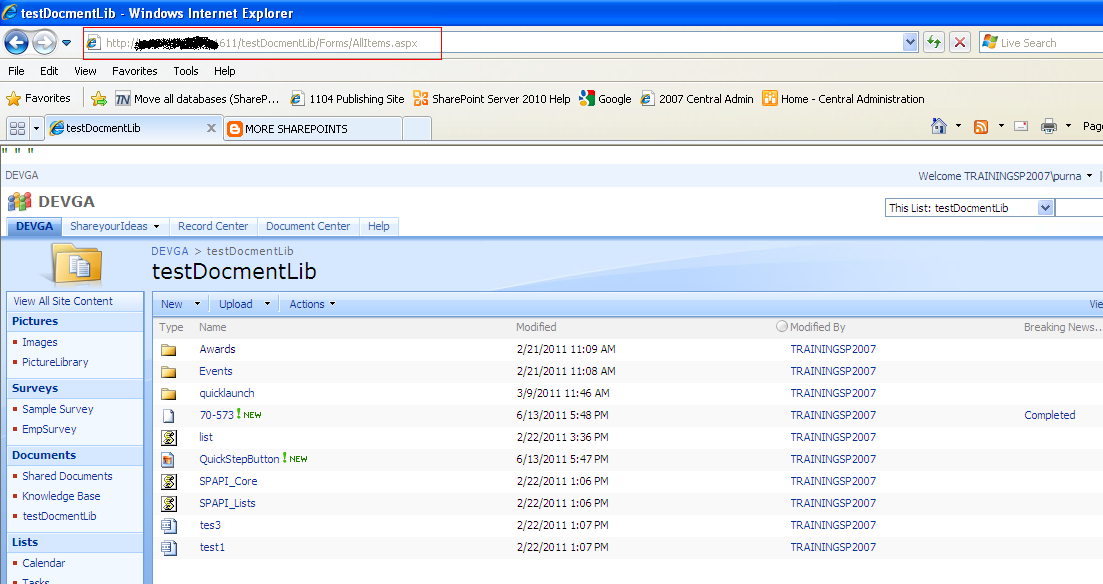
This is my Document Library


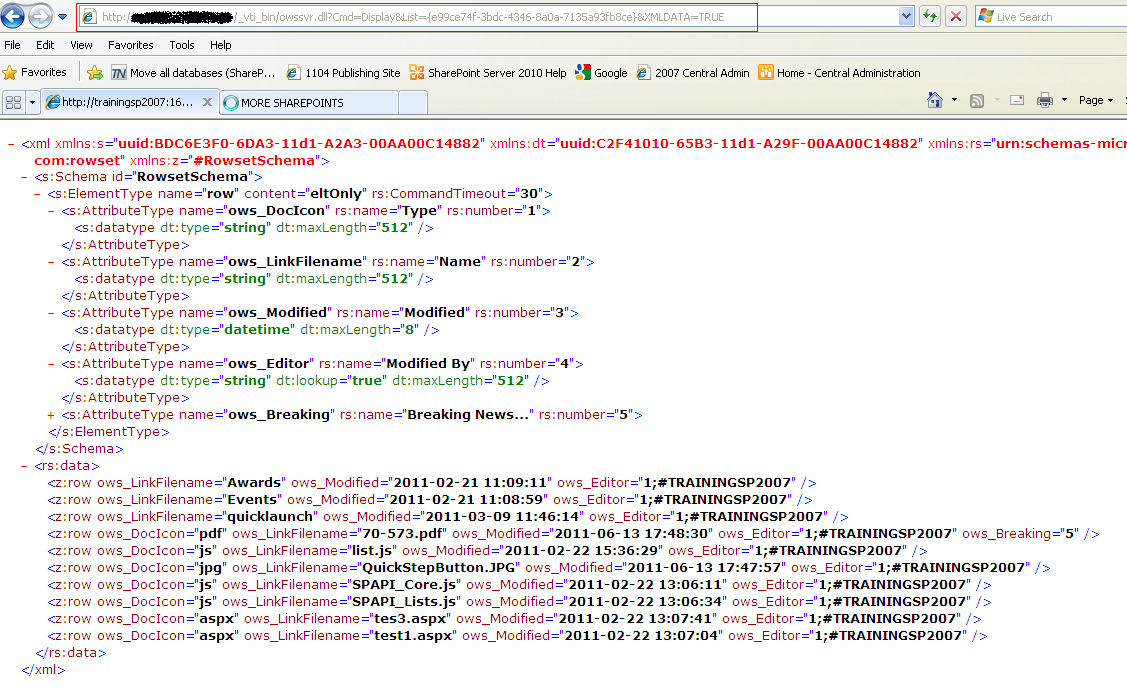
This is the XML view of the library


Here you can see the columns as attributes and the data(items) as Rows with their nodes.


Get more information on this here

http://msdn.microsoft.com/en-us/library/ms478653.aspx
As I explained above if you change the name of the column the rs:name will be changed , but the name will be remains same always. 

Thanks.

Jun 9, 2011

WorkFlow QuickStep in Ribbon

What is a QuickStep:

"This is a button in the Ribbon with which you can initiate the designer workflow".
 This will be very useful when you have

1. A work flow for the item which need to start manually and
2. The selection of a particular workflow among other workflows which associated for the item

As name itself you can initiate the workflow quickly by avoiding some of the usual steps.

Steps to create a QuickStep:

1.  I have created a custom list called “Products”

2. Added the columns Quantity (of type number) and Description (of type single line of text)


Add some test entries in to the list like this


Now I am going to create a workflow with Quickstep in ribbon for this list.

Select List tab from List Tools Category in the Ribbon .And select the Quickstep as shown below from the ribbon .


Sharepoint designer will be open with the below window


Fill the details. Here I am creating a new workflow.(Instead you can start the existed workflow tooSelect start a new workflow option).

Button Label: This is the text which will appear on the button.

Button Image: This is the Background image for the button (here I am selecting a picture sharepoint 2010 logo from my picture library).

Taskes some time to process


A workflow will be created with the name “Button-DemoQuickStep”


Add the conditions and actions (as usual) .Here I m setting a condition as If my quantity greater than 5 I am updating my description field to the “The quantity is more than 5”. 


Then Click Publish


Open the Products List. Then add a new item


A Item will be created.


Select the Items tab in List tools part in Ribbon. You will find the Button in the ribbon with the name DemoQuickstep as we given in previous steps


Select the created item and click on the Demo QuickStep button


Start the WorkFlow. Then the workflow will be run and the description will be changed as we mentioned in workflow action.


So..In this way we can create a quickstep button to start the workflow.

Mar 23, 2011

Correlation ID in Sharepoint 2010

Hi

In this Post I am going to explain you what is Correlation ID and how it will be used to get detailed information of the error .

What is Correlation ID?

The Correlation id is a unique id like a GUID(no duplicates exists) which will be used to get detailed information of the error cause


Generally In SharePoint 2010  if we get any unexcpected error we will  see a  Correlaton id along with the message “An unexpected error has occuered”.


Here the Correlation ID is: 10be3297-1975-4d6d-953e-0931b5cde56d


By using this Correlation id we can find the error information in different ways.One of the common ways we follow is tracing the log files

Go to  the Log Directory  (generally  C:\Program Files\Common Files\Microsoft Shared\Web Server Extensions\14\LOGS) and Find the log file by Date and Time 


Open that log file and Search the content with this GUID . You will get information about the error.


The other way to get the error information is, by using the Power Shell  Console(Sharepoint 2010 Management Shell).

The get-splogevent  is used for this. Here is the more information about Logging and events cmdlets from msdn site.


Command :
get-splogevent | ?{$_.Correlation -eq ""} | select Area, Category, Level, EventID, Message | Format-List


Place the generated ID in the above command

get-splogevent | ?{$_.Correlation -eq "10be3297-1975-4d6d-953e-0931b5cde56d"} | select Area, Category, Level, EventID, Message | Format-List

Then you will get  more information about the error like this...(Here i got "The file xxxxx doesnt exists at.....")


And also you can download the ULS viewer tool from msdn to get the these things done easily.

Links : http://sharepoint.microsoft.com/blogs/GetThePoint/Lists/Posts/Post.aspx?ID=353


Mar 17, 2011

Making Created By and Modified By as Annonymous for the SharePoint List

Hi Guys,

This is a small Post i am writing to explain you  how to show the CreatedBy and ModifiedBy fields to Annonymous(***) for the Sharepoint Lists.


This is my Tasks List. In this I created a list item. By default it shows who is created it and modified it.

Now I need to show this Created By and Modified By as Annonymous.

This is the code to  do this.


This is will be done by making ShowUser property of a list object making false as shown above.
So i get the result like this


This is a common scenario we need when we work with polls/surveys in sharePoint, when the users should be vote as anonymous.(Note : Also there are other ways to set as anonymous for the survey list in sharepoint)


Enjoy Reading..:)


Mar 4, 2011

Migrating SharePoint 2007 (Moss) site to SharePoint 2010 - Part-1


Hi Guys,

Here I am going to explain how to upgrade an existing MOSS site (SharePoint 2007) to SharePoint 2010.

Before going to do this we need to have some basic idea on the types of upgradation. Basically there are three types of approaches to upgrade in to Sharepoint 2010

1. In-place Upgrade
2. Database attach Upgrade
3. Hybrid Upgrade

Based on the environment and the other factors we will determine which approach is suitable for us. You can find more information regarding this in TechNet here).

Here I am explaining Database attach approach.These are the steps involved in this


1. Run the preupgradecheck in your MOSS environment
2. Backup the moss content database
3. Create a Site in Sharepoint 2010 server and remove its content database
4. Run Test-SPContentDatabase on 2010 server to analyze the mosscontentdb readiness to Upgradation
5. Add the moss contentdb to 2010 site
6. Visual upgrade to 2010 look and feel  (If you need)
7. Analyze If any errors related to customization ,missing files etc.

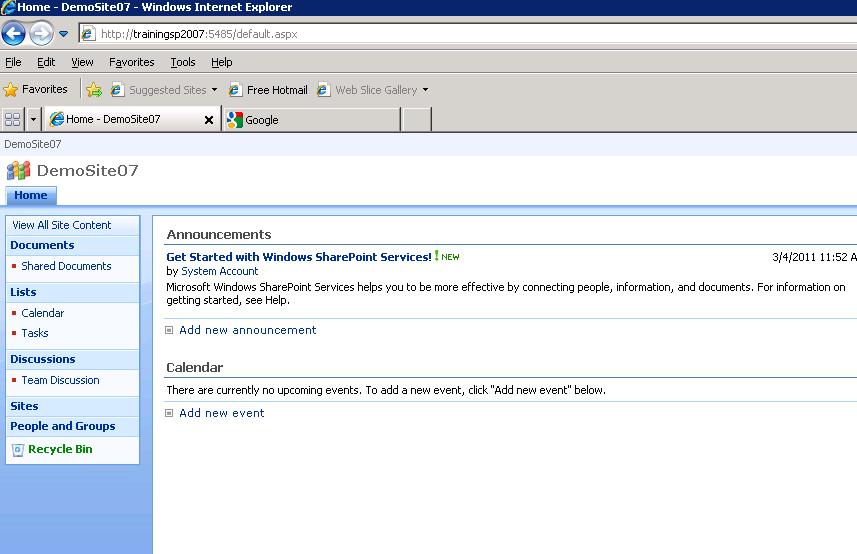
This is my MOSS site before upgradation.(Here Title: DemoSite07. Content Database :Wss_Content_5485)


The Prerequisites to Upgrade:

MOSS Server should have service pack2 Installed on it, without sp2 the preupgradecheck will not run.

Step 1:

The preupgradecheck command will give us the information about the Sharepoint 2007 Farm and the actions that need to be taken before we upgrade to sharepoint 2010. This is a nice tool provided by Microsoft, which will analyse and gives us the report in html too.

Here are the steps to use this.Open command prompt and go to the bin directory (here mine in C)

C:\Program Files\Common Files\Microsoft Shared\web server extensions\12\BIN>   stsadm –o preupgradecheck


More on Preupgradecheck rules find  here .If you get success message you can continue for the upgradation.
 
Step 2:

Take the Backup of your moss site's content database(WSS_Content_5485). 

Go to SQL server-->Select your contentdb(Wss_Content_5485)-->Tasks-->Backup.


  Select a location to keep your backup.


Now Copy this Backup and place in Sharepoint 2010 server.

Step 3:
Create a site in 2010 .(Here Title : Demo10, Content Db :Wss_Content_4311)


And remove the content database (Wss_Content_4311) attached to it.(through Sql or Central admin)


Central Administration-->Application Management-->Select your Web application-->Remove the content database


Click OK on above.And now restore your moss content database in to 2010.

Now go to sqlserver and restore your Moss Content Database (Wss_Content_5485) to the 2010 database Wss_Content_4311. (or you can restore to new database/any other existing , since anyhow we will attach this database tio our 2010 site through addcontentdb command in future.)

Go to sql -->Right Click on Database-->RestoreTo Database : select Wss_Content_4311.
Select from device and locate the path where your moss content database present and click Ok


Step 4

Now run the Test-SPContentDatabase PowerShell cmdlet to test your database( the above  restored moss contentdb) is ready to upgrade or not . It will tell you what are the missing files ,features, assemblies etc.

In 2010 server Go to Start Button -->All programs-->Microsoft SharePoint 2010 Products-->SharePoint 2010 Management Shell --> Run as Administrator(it is must otherwise gives u access denied error).


Run the below command in Powershell :

Test-SPContentDatabase  –Name    -WebApplication  

In Our case : Test-SpContentDatabase   -Name  Wss_Content_4311  -WebApplication  http://trainingsp2:4311.

It will give you all the information of missed files and assemblies etc..

Continuation to this is on my next post Migrate Moss site  to SharePoint 2010 site part-2


Migrating SharePoint 2007 (Moss) site to SharePoint 2010 - Part-2


Continuation to my previous post Migrate Moss site  to SharePoint 2010 site part-1

Here is the report of the Test-SPContentDatabase command


Here in my case I have created a event handler for the tasks using features in my Moss site but  I have not copied them to 2010 server so these are the errors/messages i got above

1. Missing Feature
2. MissingAssembly.
 

So I copied that feature and assembly from moss server to SharePoint 2010  server and then i got no errors.

Step 5:

Add the Moss content database(i.e earlier restored) to our 2010 site(Demo10).

Open command prompt and run this command

C:\Program Files\Common Files\Microsoft Shared\web server extensions\12\BIN>  stsadm -o addcontentdb -url -databasename 

Ours :stsadm –o addcontentdb  -url  http://trainingsp2:4311 –databasename Wss_Content_4311.


Above if you get 100% without any errors means the content database added to the site completely. If you get any errors check the log file at 14 hive and do the needful things (If u miss any customizations, files etc….).

With this my MOSS site is upgraded to 2010.  i.e My SharePoint 2010 site is ready with the Moss content database. 

Check it here


 Step 6 :

But the UI looks same as the Moss site . So if you want to change in to 2010 look and feel do the following settings


Then


Select the Update the user interface (before this you can preview the new UI by selecting second option above)


Then your MOSS site appears exactly  as the SharePoint 2010 site


With this you can say  your MOSS site is upgraded to SharePoint 2010.
 
Step 7:

If you want to see and analyze the upgrade status go for this location  

Central Admin-->Upgrade and Migration-->Check Upgrade Status.There you will find all the trails/attempts made for upgradation with the status error information.


Here if your Status is Failed . Go to the Log File specified over there and find the causes for it. If the Status : Succeeded, you can say your Upgradation is success without any errors.

Enjoy reading...!