Aug 23, 2015

How to get all the installed apps in a sharepoint online site programatically

Hello guys,

Here I am writing a small post on how to get the apps from a SharePoint Online site. The property "Status" of the AppInstance class tells us the app's status like whether it is installed/uninstalling/disabled etc..

Here I took a console app with managed CSOM code.

  1.        string siteUrl = "https://msplab.sharepoint.com/sites/SPOLPUB/";  
  2.        string username = "purna@msplab.onmicrosoft.com";  
  3.        string password = "mspcloud"; 
  4.        // Ref: Microsoft.SharePoint.Client
  5.        ClientContext ctx = new ClientContext(siteUrl);  
  6.       // Ref :System.Security
  7.        SecureString encryptedSecureString = new SecureString();
  8.        password.ToList().ForEach(encryptedSecureString.AppendChar);  
  9.        ctx.Credentials = new SharePointOnlineCredentials(username, encryptedSecureString); 
  10.       // Ref: Microsoft.SharePoint.Client        
  11.        Site site = ctx.Site;  
  12.        ctx.Load(site);  
  13.        ctx.ExecuteQuery();     
  14.        Console.WriteLine("Successfully Connected to Site "+site.Url);  
  15.        Console.WriteLine("Loading Web.. ");  
  16.        Web web = ctx.Web;  
  17.        ctx.Load(web, w => w.Url);  
  18.        ctx.ExecuteQuery();     
  19.        Console.WriteLine("Web Loaded.." + web.Url);  
  20.        Console.WriteLine("Getting AppInstance Collection ...");        
  21.        //CRC is from CC, so typecasting from cc         
  22.        ClientRuntimeContext ctxRuntime = (ClientContext)web.Context;
  23.        //Getting appinstances from appcatalog with webcontext  
  24.        ClientObjectCollection appInstanceCollection =AppCatalog.GetAppInstances(ctxRuntime, web);
  25.        ctxRuntime.Load(appInstanceCollection);  
  26.        ctxRuntime.ExecuteQuery();  
  27.    
  28.        Console.WriteLine("Got AppInstance Collection...");        
  29.        foreach (AppInstance appinstance in appInstanceCollection)  
  30.        {  
  31.          ctxRuntime.Load(appinstance);  
  32.          ctxRuntime.ExecuteQuery();  
  33.          Console.WriteLine("==================Retrieving App Details =================");  
  34.          Console.WriteLine("App Title: " + appinstance.Title);  
  35.          Console.WriteLine("Principle Id: " + appinstance.AppPrincipalId);  
  36.          Console.WriteLine("Web Url: " + appinstance.AppWebFullUrl);  
  37.          Console.WriteLine("Start Page: " + appinstance.StartPage);  
  38.          Console.WriteLine("Installation Status: " + appinstance.Status);  
  39.          Console.WriteLine("Remote App Url: " + appinstance.RemoteAppUrl);  
  40.          Console.WriteLine("Settings Page: " + appinstance.SettingsPageUrl);  
  41.          Console.WriteLine("Error Details: " + appinstance.GetErrorDetails());  
  42.          Console.WriteLine("==================Completed App Details =================");
  43.        }     
  44.        Console.WriteLine("Completed...");  
  45.        Console.ReadLine();


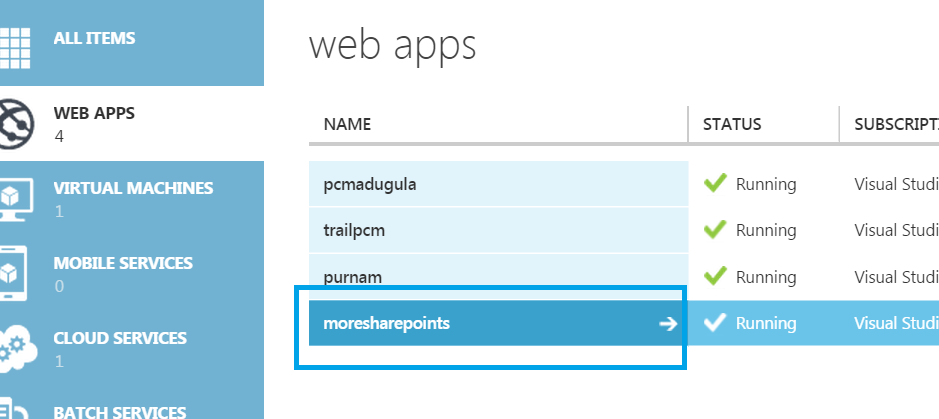
Here is the output :


If you observe the above code, we have created a object called appInstanceCollection for the ClientObjectCollection class. It needs ClientRuntimeContext and the web.

The ClientRuntimeContext represents the runtime context for  accessing data from remote objects and invoking methods on remote objects. This can be safely typecasted from ClientContext class as shown above.

Note : In the new version of the CSOM dll  you can find a new method called "GetAppDetails()" from the APPcatalog class. Please refer this link.

Hope this helps,

-Purna

Aug 18, 2015

Step by Step Guide to Create Provider Hosted App in Sharepoint 2013 Online with Azure Hosting Model- Part 1

Hello Guys,

In this post I am going to explain you how to develop and publish a SharePoint Provider Hosted app in Online. Here I am using Azure Hosting (low trust or ACS) model to publish the app.

In this post, I am mainly focusing the hands-on steps with very high level information. This is a very big post with 4 parts..

These are the steps involved in building and hosting a provider hosted app in azure.

·       Creating website in windows azure
·       Downloading the azure profile
·       Developing SharePoint provider hosted app in visual studio
·       Generating Client Id and Client Secret in Sharepoint online Site
·       Publishing the appwebsite in to azure
·       Publishing/Uploading  the app in SharePoint online appcatalog
·       Install and Run the App.

Creating website in azure:


Login to azure portal with the Microsoft account and create the azure website from the azure management portal. Like below
Go to azure management portal, Click on Websites in the left pane


Click on “New” link in the bottom left.  Then select Computeà Web AppàQuick Create

Give the url which you want to refer your azure website. Here I am giving it as “moresharepoints.azurewebsites.net”

Select the service plan (make default if you don’t have any subscription)


Then Click Create Web App link in the down. It will create a webapp with the provided url.

Click on the URL (moresharepoints.azurewebsites.net), it should show like this.


Now we are ready with the azure website. In next steps in this post, we will publish our sharepoint app web on to this website.

To publish the appwebsite on to this azure website, we have to use the profile of this website while publishing. So download the profile and save it to your desktop. We will use it in our next steps. How to download..? See below

Download the azure profile:

Go to azure management portal and click on the Website Name.


And download the publish profile. Save it to your desktop or some folder in your system.


The profile would have extension “.publishsettings”(in my case this is the profile  : “moresharepoints.azurewebsites.net.PublishSettings”.)

With this the azure website and its profile creation is done.

Now let’s go and create the SharePoint Provider Hosted app. Follow next post for the continuation...

Refer Part2 for the continuation..

Step by Step Guide to Create Provider Hosted App in Sharepoint 2013 Online with Azure Hosting Model- Part 2


This is a continuation to my previous post.Step by Step Guide to Create Provider Hosted App in Sharepoint 2013 Online with Azure Hosting Model- Part 1


Developing SharePoint provider hosted app in visual studio:


Open visual studio (in my case 2013)à Newà Project àClick on Office/Sharepoint Templates à Appà 

then select the “App for SharePoint” template. Give the name as “MSPProviderHostedDemo”.


Give the url of your sharepoint site. (Here I am giving my sharepoint online site url).
And select the option Provider Hosted as we are dealing with provider hosted in this demo.


Say next, and select the SharePoint Online as the target


Say Next.  In next screen elect Aspnet/mvc. Here iam going with asp.net web forms appn for this demo.
In Next screen, this is something important to know. See the below screen.


Here we have two options to authenticate our app with the site.

  •    Windows Azure Access Control Service – This is also called as ACS or low trust hosting      type. Basically this will be used when the appwebsite is hosted in azure. In our case we will be   using this.
  •   Use a Certificate – This is also called as High Trust/ Server to server authentication model.  Here the appwebsite is hosted on to a IIS website in a server instead in azure. The handshake  between the app and the website is done by the certificate.

Say Finish. For more details, refer authentication and hosting techniques from msdn.

So now our solution structure will be like this. It contains two projects. AppProject and AppWebProject like below.


Once you build the AppProject, itwill give the .app file(like .wsp for our sp solutions). We will publish this file to sharepoint site.

The appwebproject , we will deploy/host/publish this appwebproject to azure website.

We are ready with the solution.. Lets write a simple code for the app and web ..follow next post for the continuation...

Refer Part3 for the continuation..

Step by Step Guide to Create Provider Hosted App in Sharepoint 2013 Online with Azure Hosting Model- Part 3


Now let’s write the business logic which you required.  Here Just I am placing some div with text in default.aspx.


Next step is we need to register the client id and client secret in sharepoint site and use them in our app. (What is this Client id and Client secret??- Big QuestionJ,)

But I am not going to write details about it in this post…L ). Let’s concentrate on the steps to generate…

Generating Client Id and Client Secret in Sharepoint Online Site:


Go to the _layouts/15/appregnew.aspx page in your SharePoint site and generate client id, client secret and give the details as shown in following screen.


Title: MSPDemoProviderApp

AppDomain : Give the domain of the azure website(don’t provide http/https). In our case, it is
moresharepoints.azurewebsites.net

Redirect Url : Give the url of the azure web page where your app need to redirect/land.

The reason to give above url is, we are hosting appwebproject in to azure website. So our page default.aspx is placed in to azure site. Here we are saying the app that, go/redirect to default.aspx page in azure website upon its click.


Say Create. And save the information in to note pad.


Now we are ready with client id, client secret etc. We will use this information in our appsolution.
Go to
AppManifest.xml in AppProject(MSPProviderHostedDemo), set the required settings Title, Version , Start Page etc.. like below.


Permissions: Here I am setting Web : Full Control. Anyhow we are not dealing with any sharepoint functionality here.. But just to show you the app permissions tab, here I am giving this.


Now Right Click on AppManifest file and say view code.

Replace the Clinet Id * with the above generated client id. Like this.


And also update the Client Id and Client Secret in web.config of app webproject (MSPProviderHostedDemoWeb )with the generated Ids like below.


With this the required settings to host the app are completed in our visual studio solution. Now let’s publish the appwebproject in to azure site.

Publish the appwebsite into azure:

Right click on AppWebProject(MSPProviderHostedDemoWeb) à Say Publish.


Say Import and select Import from a publish profile file.

Then browse and select the azure profile which you downloaded in above steps.( moresharepoints.azurewebsites.net.PublishSettings)

Now it shows the connection information like below


Click the Validate connection, it should passed. Then Click Next.In Settings Window, Select Configuration as Release like below.


Then say next. Click Start Preview to see what files are going to place in azure. For the first time it publishes all your appwebproject files. From next time onwards, when you say publish it will only publish the modified files.


Now say Publish. In the OutPut window of visual studio it says “Publishe Successed” for successful publish.


With this the appwebsite publishing to azure is completed.. Lets Publish the app in to sharepoint online site in next post..  
Refer Part4 for the continuation..

Step by Step Guide to Create Provider Hosted App in Sharepoint 2013 Online with Azure Hosting Model- Part 4

This is a continuation to my previous post Step by Step Guide to Create Provider Hosted App in Sharepoint 2013 Online with Azure Hosting Model- Part 3


Publish the app in SharePoint On line site :


Right click on your appproject (MSPProviderHostedDemo) in visual studio and say publish.


Click on Edit and provide the Client and Client Secret (Which we generated in above steps).


Say Finish.

Then click on “Package the App” button. You will get a warning saying SP requires azure url as  https.

So change the url to https like below. 


Say Finish.

A App file is generated and the folder will be opened in windows explorer with the version number

path C:\Users\madpu02\Documents\Visual Studio 2013\Demos\MSPProviderHostedDemo\MSPProviderHostedDemo\bin\Debug\app.publish\1.0.0.0


Copy the app file and upload in AppsforSharepoint library in your SharePoint appcatalog site.

In my case here is the url 


Once upload is completed in appcatalog site, go to your sharepoint online site where you want to install and run this app.

 In my case url is like this https://pcmsp.sharepoint.com/sites/SPODev
Go to site contents à Add an App à Then our app should appears in the “apps you can add”section like below.


Click on App and Say Trust It


With this your app installtion is completed. You can see it in site contents tab like below.


Now click on the app, it should redirect to default.aspx page in our azure website like this.


The url looks like this , it contains the host sharepoint site url as a parameter for the the azure website url..


We Successfully Created and Published the Provider Hosted app in to Azure...!! Hope this post helps you guys...!!

- Purna


Aug 6, 2015

ASP.NET Site failed starting up, see full details for more info. System.Web.HttpException (0x80004005): Unrecognized configuration section log4net.

Guys,

If you are using log4net in your asp.net website, you may encounter the below error

System.Web.HttpException (0x80004005): Unrecognized configuration section log4net. (C:\Users\madpu02\Documents\My Web Sites\WebMatrixRemote\moresharepoints\web.config line 42) ---> System.Configuration.ConfigurationErrorsException: Unrecognized configuration section log4net. (C:\Users\madpu02\Documents\My Web Sites\WebMatrixRemote\moresharepoints\web.config line 42)
   at System.Web.HttpRuntime.HostingInit(HostingEnvironmentFlags hostingFlags, PolicyLevel policyLevel, Exception appDomainCreationException)
   at Microsoft.WebMatrix.Editor.CBMWrapper.HandleExceptionAndReturnEmptyArray(Exception ex, Boolean throwOnHttpException)
   at Microsoft.WebMatrix.Editor.CBMWrapper.GetReferences()
   at Microsoft.WebMatrix.Editor.Roslyn.ProjectSystemImpl.CbmAppDomainStarted(Object sender, EventArgs e)

The reason for this error is  the asp.net websites requires a log4net config section in web.config file.

Resolution : Add the log4net section in Config Sections of the webconfig .

 <configSections>
    <section name="log4net" type="log4net.Config.Log4NetConfigurationSectionHandler, log4net"/>  
</configSections>


For Asp.Net WebApplications(not websites) this is not required.